How to Find, Create, and Master Your WordPress .htaccess File
How to Find, Create, and Master Your WordPress .htaccess File
The .htaccess file is one of the most powerful and often overlooked configuration files on any Apache web server, and it plays a critical role in how your WordPress site functions. For many WordPress users, it remains a mysterious, hidden file that they only interact with when something goes wrong, or when following a tutorial to implement a specific feature. However, understanding how to find, create, and properly utilize your .htaccess file can unlock significant control over your site’s permalinks, security, redirects, and caching.
This comprehensive guide will demystify the WordPress .htaccess file. We’ll walk you through its purpose, explain where to locate it, provide clear instructions on how to create it if it’s missing, and show you how to leverage its capabilities for enhancing your WordPress experience. Whether you’re troubleshooting a broken permalink, setting up redirects, or bolstering your site’s security, mastering the .htaccess file is an essential skill for any serious WordPress administrator.
What is the .htaccess File and Why is it So Important for WordPress?
The term .htaccess stands for “Hypertext Access.” It’s a directory-level configuration file supported by Apache web servers. When placed in a directory, the .htaccess file is read by the Apache web server and applies its directives to that directory and all its subdirectories.
For WordPress, the .htaccess file is primarily used to manage permalinks. Without it, your “pretty” URLs (like yourdomain.com/my-awesome-post/) wouldn’t work, and you’d be stuck with ugly, less SEO-friendly URLs (like yourdomain.com/?p=123). Beyond permalinks, its importance extends to:
- Redirections: Implementing 301 redirects for changed URLs, moving domains, or forcing HTTPS.
- Security: Protecting sensitive files, blocking IP addresses, preventing hotlinking, and other security hardening measures.
- Performance: Configuring browser caching to speed up your site for returning visitors.
- Custom Error Pages: Defining custom pages for 404 (Not Found), 500 (Internal Server Error), and other HTTP errors.
In essence, the .htaccess file acts as a powerful rulebook for your server, dictating how it should interact with requests made to your WordPress installation.
Locating Your WordPress .htaccess File
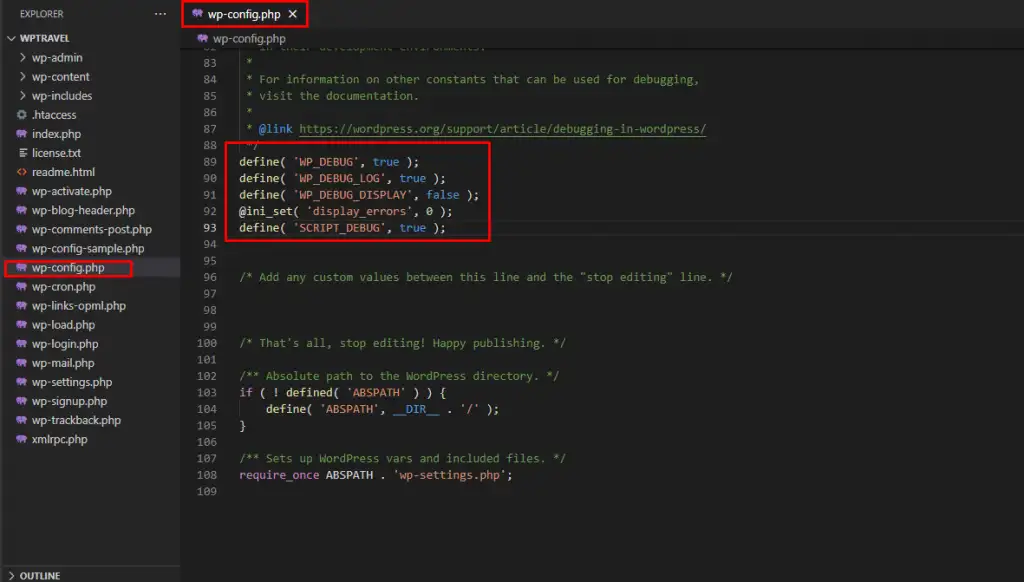
Before you can edit or create your .htaccess file, you need to know where to find it. The .htaccess file is typically located in the root directory of your WordPress installation. This is the same directory where you’ll find other core WordPress files and folders like wp-config.php, wp-content, wp-admin, and wp-includes.
Here’s how you can find it using common methods:
Method 1: Using an FTP Client (FileZilla, Cyberduck, etc.)
- Connect to Your Server: Open your FTP client and connect to your web hosting account using your FTP credentials (hostname, username, password, port).
- Navigate to Your WordPress Root: Once connected, you’ll typically see a directory structure. Navigate to your main website folder, which is often named
public_html,www, or your domain name. - Show Hidden Files: The
.htaccessfile starts with a dot (.), which means it’s a hidden file on Unix-like systems (which most web servers are). Your FTP client needs to be configured to show hidden files.- FileZilla: Go to
Server>Force showing hidden files. - Cyberduck: Go to
View>Show Hidden Files. - Other FTP Clients: Look for a similar option in the “View” or “Server” menu.
- FileZilla: Go to
- Locate the File: After enabling hidden files, you should see the
.htaccessfile in your WordPress root directory.
Method 2: Using cPanel File Manager
If your hosting provider offers cPanel, the File Manager is an excellent web-based tool for managing your files:
- Log in to cPanel: Access your cPanel account through your hosting provider’s portal.
- Open File Manager: In the “Files” section, click on “File Manager.”
- Navigate to Your WordPress Root: The File Manager will open, typically showing your
public_htmldirectory. Double-click onpublic_html(or the directory where your WordPress is installed). - Show Hidden Files: In the top-right corner of the File Manager, click on “Settings.” In the pop-up window, check the box that says “Show Hidden Files (dotfiles)” and click “Save.”
- Locate the File: The
.htaccessfile should now be visible in your WordPress root directory.
Important Note: If you use a non-Apache server (like Nginx), you might not have an .htaccess file at all. Nginx uses its own configuration files (e.g., nginx.conf) for these settings. Most shared hosting providers use Apache, so this guide primarily focuses on Apache environments.
Creating or Re-creating the WordPress .htaccess File
There are instances where your .htaccess file might be missing, either accidentally deleted or never created in the first place (especially after a manual WordPress installation or migration). Fortunately, WordPress can usually generate one automatically, or you can create it manually.
Method 1: Automatic Generation (The Easiest Way)
WordPress can often generate the default .htaccess file for you if you simply resave your permalink settings. This is the safest and recommended method for most users.
- Log in to Your WordPress Admin Dashboard.
- Go to Settings > Permalinks.
- Scroll Down and Click “Save Changes.” You don’t need to change any settings; just clicking “Save Changes” is enough. WordPress will attempt to write the necessary rules to your
.htaccessfile.
After saving, check your WordPress root directory using your FTP client or cPanel File Manager (remember to show hidden files) to confirm that the .htaccess file has been created.
Troubleshooting Automatic Generation: If WordPress fails to create the file, it might be due to incorrect file permissions on your WordPress root directory. The directory needs to be writable by the server. You might see a message like “You should update your .htaccess file now” in the Permalinks settings. If this happens, you’ll need to create it manually.
Method 2: Manual Creation (When Automatic Fails)
If the automatic method doesn’t work, or if you prefer a hands-on approach, you can create the .htaccess file manually. This requires creating a new text file and adding the default WordPress rules.
- Open a Plain Text Editor: Use a simple text editor like Notepad (Windows), TextEdit (Mac – ensure it’s saving as plain text), Sublime Text, VS Code, or Notepad++. Do NOT use word processors like Microsoft Word, as they add formatting that will break the file.
- Copy the Default WordPress .htaccess Code: The standard WordPress
.htaccesscontent is as follows. Copy this exact code:# BEGIN WordPress <IfModule mod_rewrite.c> RewriteEngine On RewriteBase / RewriteRule ^index.php$ - [L] RewriteCond %{REQUEST_FILENAME} !-f RewriteCond %{REQUEST_FILENAME} !-d RewriteRule . /index.php [L] </IfModule> # END WordPress - Paste and Save the File: Paste the code into your text editor. Save the file with the name
.htaccess(make sure there’s no.txtextension at the end). Some editors might warn you about the leading dot; confirm you want to save it that way. - Upload the File:
- Using FTP: Connect to your server via FTP, navigate to your WordPress root directory, and upload the newly created
.htaccessfile. - Using cPanel File Manager: In your WordPress root directory, click on the “+ File” button at the top. Enter
.htaccessas the new file name and click “Create New File.” Then, right-click on the newly created (and likely empty).htaccessfile, select “Edit,” paste the default code, and click “Save Changes.”
- Using FTP: Connect to your server via FTP, navigate to your WordPress root directory, and upload the newly created
- Set File Permissions (Optional, but Recommended for Troubleshooting): After uploading, it’s good practice to ensure the
.htaccessfile has the correct permissions. The recommended permissions for.htaccessare typically644.- In FTP: Right-click on the
.htaccessfile, select “File permissions…” or “Change permissions…”, and enter644. - In cPanel File Manager: Right-click on the
.htaccessfile, select “Change Permissions,” and ensure “Read” is checked for Owner, Group, and Public, and “Write” is only checked for Owner. This corresponds to644.
- In FTP: Right-click on the
Editing Your .htaccess File Safely
Once you’ve located or created your .htaccess file, you can start making custom modifications. However, always proceed with caution, as a single typo can bring your entire site down with a “500 Internal Server Error.”
Crucial First Step: Always Backup!
Before making ANY changes to your .htaccess file, always download a copy of the existing file to your local computer. This way, if something goes wrong, you can easily upload the working backup and restore your site.
Editing Methods:
- Via FTP Client: Download the
.htaccessfile, open it in your plain text editor, make your changes, save the file, and then upload it back to your server, overwriting the old one. - Via cPanel File Manager: Right-click on the
.htaccessfile, select “Edit” or “Code Edit,” make your changes in the editor, and then click “Save Changes.”
Common and Useful .htaccess Configurations for WordPress
Here are some common directives you might add to your .htaccess file. Always add custom directives *outside* the # BEGIN WordPress and # END WordPress blocks, typically above or below them. This ensures WordPress can still manage its own rules without conflicts.
1. Force HTTPS (SSL/TLS)
If you have an SSL certificate installed, forcing HTTPS ensures all traffic to your site is encrypted.
RewriteEngine On
RewriteCond %{HTTPS} off
RewriteRule ^(.*)$ https://%{HTTP_HOST}%{REQUEST_URI} [L,R=301]
2. Redirect Non-www to www (or Vice Versa)
Choose one version of your domain to be canonical for SEO purposes.
Force www:
RewriteEngine On
RewriteCond %{HTTP_HOST} ^yourdomain.com [NC]
RewriteRule ^(.*)$ http://www.yourdomain.com/$1 [L,R=301]
Force non-www:
RewriteEngine On
RewriteCond %{HTTP_HOST} ^www.yourdomain.com [NC]
RewriteRule ^(.*)$ http://yourdomain.com/$1 [L,R=301]
Remember to replace yourdomain.com with your actual domain. If forcing HTTPS as well, combine these rules carefully, usually applying the HTTPS rule first.
3. Block IP Addresses
To block specific malicious IP addresses from accessing your site:
<Limit GET POST>
order allow,deny
deny from 123.45.67.89
deny from 98.76.54.32
allow from all
</Limit>
Replace 123.45.67.89 and 98.76.54.32 with the actual IP addresses you want to block.
4. Protect wp-config.php
The wp-config.php file contains your database credentials and is extremely sensitive. You can deny direct access to it:
<Files wp-config.php>
order allow,deny
deny from all
</Files>
5. Disable Directory Browsing
Prevent users from seeing a list of files in your directories if there’s no index file (like index.php).
Options -Indexes6. Custom Error Pages
Direct users to a custom page for common errors, improving user experience:
ErrorDocument 404 /404.html
ErrorDocument 500 /500.html
Ensure 404.html and 500.html (or whatever you name them) exist in your WordPress root directory.
7. Browser Caching (Leverage Browser Caching)
Tell browsers how long to cache static assets like images, CSS, and JavaScript, reducing load times for returning visitors. This is a common recommendation for improving performance in tools like Google PageSpeed Insights.
<IfModule mod_expires.c>
ExpiresActive On
ExpiresByType image/jpg "access 1 year"
ExpiresByType image/jpeg "access 1 year"
ExpiresByType image/gif "access 1 year"
ExpiresByType image/png "access 1 year"
ExpiresByType image/svg "access 1 year"
ExpiresByType text/css "access 1 month"
ExpiresByType application/pdf "access 1 month"
ExpiresByType application/javascript "access 1 month"
ExpiresByType application/x-javascript "access 1 month"
ExpiresByType application/x-shockwave-flash "access 1 month"
ExpiresByType image/x-icon "access 1 year"
ExpiresDefault "access 2 days"
</IfModule>
Troubleshooting Common .htaccess Issues
Working with the .htaccess file can be tricky. Here are some common problems and their solutions:
1. 500 Internal Server Error
This is the most common and frustrating error caused by .htaccess. It typically means there’s a syntax error in your .htaccess file.
- Solution: Restore your backup
.htaccessfile. If you don’t have one, delete the problematic.htaccessfile via FTP/File Manager, then try re-generating it using the Permalinks settings. Then re-add your custom rules one by one, testing after each addition to identify the culprit. - Check File Permissions: Ensure your
.htaccessfile has644permissions.
2. Permalinks Not Working
If your “pretty” permalinks result in 404 errors, but default permalinks (with ?p=123) work, it’s almost certainly an .htaccess issue.
- Solution: Go to
Settings > Permalinksin your WordPress admin and simply click “Save Changes” to force WordPress to rewrite the file. - Check for Missing File: Ensure the
.htaccessfile exists and is in the root of your WordPress installation. - Check for
mod_rewrite: Your server might not have Apache’smod_rewritemodule enabled, which is essential for permalinks. You’ll need to contact your hosting provider to confirm and enable it.
3. Specific Rules Not Taking Effect
If you’ve added a custom rule (e.g., a redirect) but it’s not working:
- Check for Typos: Even a single character can break a rule. Double-check your syntax.
- Order of Rules: The order of rules matters. Sometimes one rule can override another. Try moving your custom rule to a different position (e.g., above or below existing rules).
- Cache: Clear any caching plugins on your WordPress site and your browser cache.
Best Practices for Managing Your .htaccess File
To ensure smooth operation and prevent issues, follow these best practices when dealing with your .htaccess file:
- Always Backup: This cannot be stressed enough. Always keep a backup of your working
.htaccessfile before making changes. - Use a Plain Text Editor: Avoid rich text editors.
- Test Changes Incrementally: If adding multiple rules, add them one at a time and test your site after each addition.
- Place Custom Rules Carefully: Add your custom rules outside the
# BEGIN WordPressand# END WordPressblocks. Placing them within these blocks means WordPress might overwrite them. It’s generally best to place them *before* the# BEGIN WordPressline. - Understand the Directives: Don’t just copy and paste code you don’t understand. Research what each directive does to avoid unintended consequences. For more detailed insights into server configurations and advanced optimizations, consider exploring our guide section.
- Monitor Your Site: After making changes, thoroughly test your site, checking different pages, functionalities, and permalinks.
- Use Comments: Add comments (lines starting with
#) to explain what each custom rule does. This will help you or future administrators understand the file later.# Redirect old-page to new-page Redirect 301 /old-page.html /new-page/ - Check Server Logs: If you encounter a 500 error, your server’s error logs can often provide specific details about which line in the
.htaccessfile is causing the problem. You can usually access these via cPanel or by contacting your host.
Conclusion
The WordPress .htaccess file, though seemingly intimidating, is a powerful tool for controlling how your web server interacts with your site. By understanding how to find, create, and safely modify this file, you gain a significant advantage in managing your WordPress site’s performance, security, and user experience.
Always remember the golden rule: backup before you edit. With caution and a systematic approach, you can confidently harness the power of the .htaccess file to optimize your WordPress installation, resolve common issues, and implement advanced configurations to make your website more robust and efficient.
- Install WordPress: Your Complete Step-by-Step Guide
- How to Extract a .wpress File: Your Comprehensive Guide to Unpacking WordPress Backups
- Fixing YouTube Video Display Errors in WordPress: A Comprehensive Troubleshooting Guide
- Guide to Installing WordPress Themes: A Comprehensive Step-by-Step Tutorial
- Unlock Any Site’s Secret: WordPress Theme Detector
Related articles:
-

Unlock Any Site’s Secret: WordPress Theme Detector
-

Ultimate WordPress Hosting Guide: Speed & Security
-

Install WordPress: Your Complete Step-by-Step Guide
-

How to Rename WordPress Theme Folder (Without Errors)
-
Fixing YouTube Video Display Errors in WordPress: A Comprehensive Troubleshooting Guide
-

How to Extract a .wpress File: Your Comprehensive Guide to Unpacking WordPress Backups
-

How to Handle Common Elementor Errors: Your Ultimate Troubleshooting Guide
-

How to Install Flatsome Theme on WordPress: A Complete Step-by-Step Guide
-

How to Enable Debug Mode in WordPress: Your Essential Guide to Troubleshooting Errors
-

How to Create a Child Theme for Any WordPress Theme: The Definitive Guide
-
Guide to Installing WordPress Themes: A Comprehensive Step-by-Step Tutorial
-

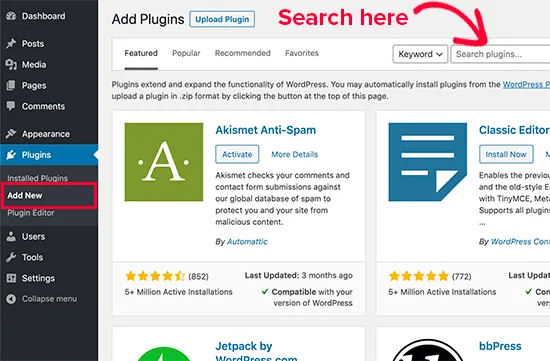
The Ultimate Guide to Installing WordPress Plugins: Step-by-Step for Every User