How to Install Flatsome Theme on WordPress: A Complete Step-by-Step Guide
Installing a new WordPress theme can transform your website’s appearance and functionality, and Flatsome is an exceptional choice, especially for eCommerce sites. Known for its powerful UX Builder, extensive customization options, and deep integration with WooCommerce, Flatsome makes building a stunning online store or business website accessible to everyone. This comprehensive guide will walk you through the process of installing the Flatsome theme for WordPress, ensuring a smooth setup from start to finish.
Why Choose Flatsome for Your WordPress Site?
Before diving into the installation, it’s worth understanding why Flatsome has become a go-to theme for thousands of WordPress users. Flatsome stands out as one of the most versatile premium WordPress themes available, particularly revered for its:
- UX Builder: A drag-and-drop page builder that offers unparalleled flexibility in designing layouts and content without touching a single line of code.
- WooCommerce Integration: Built from the ground up to work seamlessly with WooCommerce, providing enhanced shop features, product page layouts, and conversion-focused elements.
- Performance Optimization: Flatsome is engineered for speed, ensuring your website loads quickly, which is crucial for SEO and user experience.
- Extensive Customization: From header styles to footer layouts, typography, and color schemes, Flatsome offers a vast array of options in the WordPress Customizer.
- Responsive Design: Your Flatsome site will look impeccable on any device, from desktops to tablets and smartphones, ensuring a consistent user experience.
- Regular Updates & Support: The theme is consistently updated to keep pace with WordPress and WooCommerce advancements, backed by a dedicated support team.
With these benefits in mind, let’s get your Flatsome theme up and running!
Pre-installation Checklist: What You Need Before You Start
A smooth installation begins with proper preparation. Make sure you have the following ready:
- A Working WordPress Installation: You need a functional WordPress site already hosted on a web server. If you haven’t set up WordPress yet, most hosting providers offer one-click installation.
- Reliable Web Hosting: Ensure your hosting environment meets WordPress’s minimum requirements and ideally, Flatsome’s recommendations for optimal performance (PHP 7.4+, MySQL 5.6+ or MariaDB 10.1+, WP memory limit of 128MB+).
- Flatsome Theme Files: You must have purchased Flatsome from ThemeForest (an Envato Market) and have access to the theme files.
- WordPress Admin Access: You’ll need administrator credentials to log into your WordPress dashboard.
- FTP Client (Optional but Recommended): Software like FileZilla can be useful for manual installation or troubleshooting.
- Backup: While installing a theme is generally safe, it’s always wise to create a full backup of your existing WordPress site, especially if it’s already live.
For more in-depth knowledge on WordPress setup and troubleshooting, refer to our extensive collection of WordPress guides.
Step 1: Downloading Your Flatsome Theme Files from ThemeForest
The first step is to get the theme files onto your local computer.
- Log in to ThemeForest: Go to ThemeForest.net and log in with your Envato Market account.
- Navigate to Downloads: In the top right corner, hover over your username and click on “Downloads” from the dropdown menu.
- Locate Flatsome: Find Flatsome in your list of purchased items.
- Download “Installable WordPress file only”: Click the “Download” button next to Flatsome. You’ll see several options. Choose “Installable WordPress file only.” This will download a file named
flatsome.zip. This is the only file you need for installation via the WordPress dashboard. - Optional: Download “All files & documentation”: If you plan to install via FTP, or if you need the child theme, documentation, or licensing information, you might choose “All files & documentation.” This will download a larger ZIP file. You will then need to unzip this file on your computer and locate the
flatsome.zipfile (andflatsome-child.zip) within it. Make sure you only upload theflatsome.zip, not the entire package.
Save the flatsome.zip file to a location on your computer where you can easily find it.
Step 2: Installing the Flatsome Theme on Your WordPress Website
There are generally three methods to install a WordPress theme. We’ll cover the most common and easiest first.
Method 1: Installing via WordPress Admin Dashboard (Recommended)
This is the simplest and most common method for theme installation.
- Log in to your WordPress Dashboard: Go to
yourdomain.com/wp-adminand enter your credentials. - Navigate to Themes: In the left-hand menu, go to Appearance > Themes.
- Add New Theme: At the top of the Themes page, click the “Add New” button.
- Upload Theme: On the “Add Themes” page, click the “Upload Theme” button at the top.
- Choose File: Click the “Choose File” button. Navigate to where you saved the
flatsome.zipfile on your computer, select it, and click “Open.” - Install Now: Click the “Install Now” button. WordPress will now upload and install the theme. This might take a few moments depending on your internet connection and hosting speed.
- Installation Success: Once installed, you’ll see a success message: “Theme installed successfully.”
Do not click “Activate” just yet. We’ll cover activation in a dedicated step to ensure all prerequisites are met.
Method 2: Installing Flatsome via FTP (File Transfer Protocol)
This method is useful if you encounter issues with the WordPress dashboard upload (e.g., file size limits, timeouts) or if you prefer manual control.
- Unzip the Flatsome Package (if applicable): If you downloaded the “All files & documentation” package, you need to unzip it first. Inside, you will find the
flatsome.zipfile. Unzip this specificflatsome.zipfile on your local computer to extract theflatsomefolder. This folder contains all the theme’s core files. - Connect to your Server via FTP: Open your FTP client (e.g., FileZilla) and connect to your web server using the FTP credentials provided by your hosting provider (hostname, username, password, port).
- Navigate to Themes Folder: Once connected, browse to your WordPress installation directory. This is usually
public_html,www, or the root of your domain. Navigate further intowp-content > themes. - Upload the Flatsome Folder: On the left side of your FTP client (local site), locate the unzipped
flatsomefolder. Drag and drop this folder from your local site into thewp-content/themesdirectory on your remote server (right side). This process can take some time as it involves uploading many files. - Upload Child Theme (Recommended): While still connected via FTP, locate the
flatsome-child.zipfile (usually found within the “All files & documentation” package) and unzip it. Upload the resultingflatsome-childfolder to the samewp-content/themesdirectory. Using a child theme is crucial for making customizations without losing them during theme updates.
Method 3: Installing Flatsome via cPanel File Manager
Many hosting providers offer cPanel, which includes a File Manager. This is an alternative to FTP and can be faster for uploading large files.
- Log in to your cPanel: Access your hosting account’s cPanel dashboard (usually
yourdomain.com/cpanel). - Open File Manager: Find and click on the “File Manager” icon.
- Navigate to Themes Folder: In the File Manager interface, navigate to your WordPress installation directory (e.g.,
public_html) and then go towp-content > themes. - Upload the Theme ZIP: Click the “Upload” button in the top menu. This will open a new tab or window. Click “Select File” and choose the
flatsome.zipfile (the one downloaded as “Installable WordPress file only”) from your computer. - Upload Child Theme (Recommended): Repeat the upload process for
flatsome-child.zipif you plan to use a child theme. - Extract the Theme: Once the upload is complete (the progress bar turns green), go back to the File Manager tab/window. You should see the
flatsome.zipfile in thewp-content/themesdirectory. Right-click on theflatsome.zipfile and select “Extract.” - Specify Extraction Path: A dialog box will appear. Ensure the path is correct (
/public_html/wp-content/themes/) and click “Extract Files.” - Delete ZIP Files: After extraction, you’ll see a new
flatsomefolder. You can now delete theflatsome.zipandflatsome-child.zipfiles to save space by right-clicking them and selecting “Delete.”
Step 3: Activating the Flatsome Theme
Regardless of the installation method you chose, the final step to make Flatsome live is activation.
- Go to Appearance > Themes: Log in to your WordPress dashboard and navigate to Appearance > Themes.
- Find Flatsome: You should now see Flatsome listed among your installed themes.
- Activate the Theme: Hover over the Flatsome theme thumbnail and click the “Activate” button.
- Activate Child Theme (Highly Recommended): If you uploaded the Flatsome Child Theme, activate the child theme instead of the parent Flatsome theme. This ensures that any customizations you make will be preserved even when you update the main Flatsome theme. You’ll still get all the functionality of the parent theme.
Once activated, your website will immediately switch to the Flatsome theme. At this point, it will likely look quite bare. Don’t worry, the next step will help you set it up properly.
Step 4: Running the Flatsome Setup Wizard
After activation, Flatsome will prompt you to run its setup wizard. This wizard streamlines the initial configuration, making it much easier to get started.
- Start the Wizard: Upon activation, you’ll likely be redirected to the Flatsome welcome screen, or you’ll see a notice prompting you to “Run the Setup Wizard.” Click on it.
- Child Theme (if not already done): The wizard will usually first offer to install a child theme. If you haven’t already uploaded and activated one, this is an excellent opportunity to do so. Click “Install Child Theme.”
- Plugins: Flatsome will then recommend or require certain plugins (e.g., WooCommerce). Select the plugins you need and click “Continue.”
- Demo Content (Optional): This is a crucial step if you want to quickly get a professional-looking site. Flatsome offers various pre-built demos (e.g., Shop, Corporate, Agency). Choose a demo that best fits your niche and click “Continue.” Importing demo content will populate your site with pages, posts, products, and settings, providing a strong foundation for customization. Be aware that importing demo content can overwrite existing content, so it’s best done on a fresh WordPress installation.
- License Key: The wizard will ask for your Envato purchase code (license key). Enter it to enable theme updates and access to Flatsome Studio. You can find your purchase code in your ThemeForest download section, under “License certificate & purchase code.”
- Done!: Once all steps are completed, you’ll be prompted to “View Your New Website” or “Start Page Building.”
Step 5: Verifying Theme Installation and Initial Configuration
After completing the setup wizard, take a moment to verify everything is working correctly.
- Visit Your Site: Go to your website’s front-end (
yourdomain.com). It should now display the Flatsome theme, possibly with the demo content you imported. - Check Theme Options: In your WordPress dashboard, go to Flatsome > Theme Options (or Appearance > Customize). Explore the options to see the vast customization possibilities Flatsome offers.
- Check Plugins: Ensure all necessary plugins (especially WooCommerce if you’re building an online store) are installed and active.
Troubleshooting Common Flatsome Installation Issues
Even with careful steps, you might encounter issues. Here are some common problems and their solutions:
- “Missing Style Sheet” Error: This error often occurs because you uploaded the entire downloaded package ZIP file from ThemeForest instead of the specific
flatsome.zipfile. Remember to unzip the main download package and then upload only theflatsome.zipfile. - Max Upload File Size Exceeded: If you get an error about the file size limit during dashboard upload, your web host has a low limit. Use the FTP or cPanel File Manager method, or contact your hosting provider to increase your
upload_max_filesizeandpost_max_sizevalues in your PHP configuration. - White Screen of Death (WSOD): This usually indicates a fatal PHP error. Deactivate all plugins and switch back to a default theme (like Twenty Twenty-Four) via FTP (rename the
flatsomefolder inwp-content/themes). Then reactivate plugins one by one and reinstall Flatsome. Check your server’s error logs for clues. - Demo Import Issues: If demo import fails, it’s often due to low server resources (memory limit, execution time). Increase PHP
memory_limit,max_execution_time, andmax_input_timein your php.ini or via your hosting control panel. - Theme Options Not Saving: This can be related to memory limits or specific server configurations. Ensure your PHP memory limit is at least 128MB, preferably 256MB. Clearing your browser cache can sometimes help.
What’s Next? Maximizing Your Flatsome Theme Experience
Now that Flatsome is installed and activated, the real fun begins – customizing your site to match your brand vision. Here are some key areas to explore:
- Flatsome Studio: This is an incredibly powerful feature accessible from your WordPress dashboard (Flatsome > Flatsome Studio). It provides a library of pre-designed sections, pages, and layouts that you can import and customize using the UX Builder. It’s a huge time-saver for building professional pages quickly.
- UX Builder: Flatsome’s proprietary page builder is where you’ll spend most of your design time. Navigate to any page or post and click “Edit with UX Builder” to drag, drop, and configure elements, rows, columns, and modules to create custom layouts.
- Theme Options (WordPress Customizer): Go to Appearance > Customize to access Flatsome’s extensive global settings. Here you can control your site’s header, footer, typography, colors, blog layouts, shop settings, and much more. Any changes made here are reflected live.
- WooCommerce Setup: If you’re building an online store, dive into WooCommerce settings to configure products, shipping, payment gateways, and taxes. Flatsome provides excellent tools within the theme options to style your shop.
- Child Theme (if not already done): We can’t stress this enough. If you haven’t activated a child theme yet, please do so. It protects your customizations from being overwritten during future theme updates, ensuring your hard work isn’t lost.
- Essential Plugins: While Flatsome is powerful on its own, consider adding essential plugins for SEO (Yoast SEO, Rank Math), caching (WP Super Cache, WP Rocket), security (Wordfence, Sucuri), and backups (UpdraftPlus).
Conclusion
You’ve successfully installed the Flatsome theme on your WordPress website! By following these detailed instructions, you now have a robust and highly customizable foundation for building an outstanding online presence, whether it’s a bustling eCommerce store or a professional business portfolio. Take your time to explore Flatsome’s vast features, experiment with the UX Builder, and leverage its powerful options to create a truly unique and engaging user experience.
- Install WordPress: Your Complete Step-by-Step Guide
- How to Rename WordPress Theme Folder (Without Errors)
- How to Handle Common Elementor Errors: Your Ultimate Troubleshooting Guide
- Fixing YouTube Video Display Errors in WordPress: A Comprehensive Troubleshooting Guide
- Ultimate WordPress Hosting Guide: Speed & Security
Related articles:
-

Unlock Any Site’s Secret: WordPress Theme Detector
-

Ultimate WordPress Hosting Guide: Speed & Security
-

Install WordPress: Your Complete Step-by-Step Guide
-

How to Rename WordPress Theme Folder (Without Errors)
-
Fixing YouTube Video Display Errors in WordPress: A Comprehensive Troubleshooting Guide
-

How to Extract a .wpress File: Your Comprehensive Guide to Unpacking WordPress Backups
-

How to Handle Common Elementor Errors: Your Ultimate Troubleshooting Guide
-

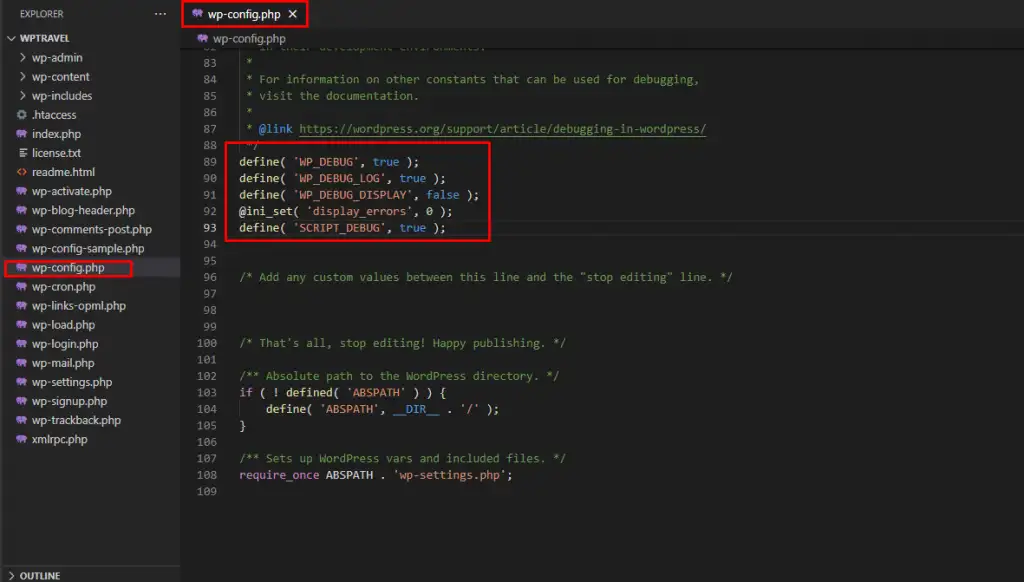
How to Enable Debug Mode in WordPress: Your Essential Guide to Troubleshooting Errors
-

How to Create a Child Theme for Any WordPress Theme: The Definitive Guide
-
Guide to Installing WordPress Themes: A Comprehensive Step-by-Step Tutorial
-

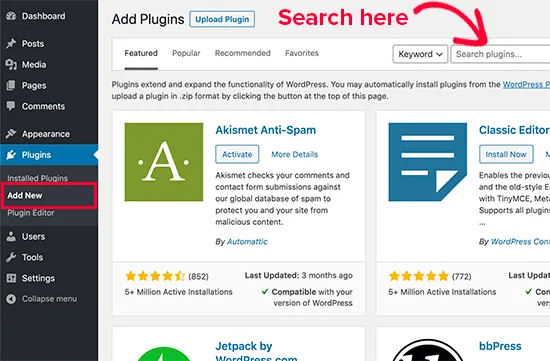
The Ultimate Guide to Installing WordPress Plugins: Step-by-Step for Every User
-

How to Find, Create, and Master Your WordPress .htaccess File